Library Patron: 3D Print Replication Process
Sometimes complex problems have simple solutions, as long as you stick to a diligent design process.
For this project, I was asked to replicate a specific kind of gate latch for a patron at the University of Idaho Makerspace (MILL LAB). Luckily the patron already had an extra for the required replication, I used this spare-part as a reference for the 3D modelling segment of my process.
For this project, I was asked to replicate a specific kind of gate latch for a patron at the University of Idaho Makerspace (MILL LAB). Luckily the patron already had an extra for the required replication, I used this spare-part as a reference for the 3D modelling segment of my process.
Step 1: Know your Game
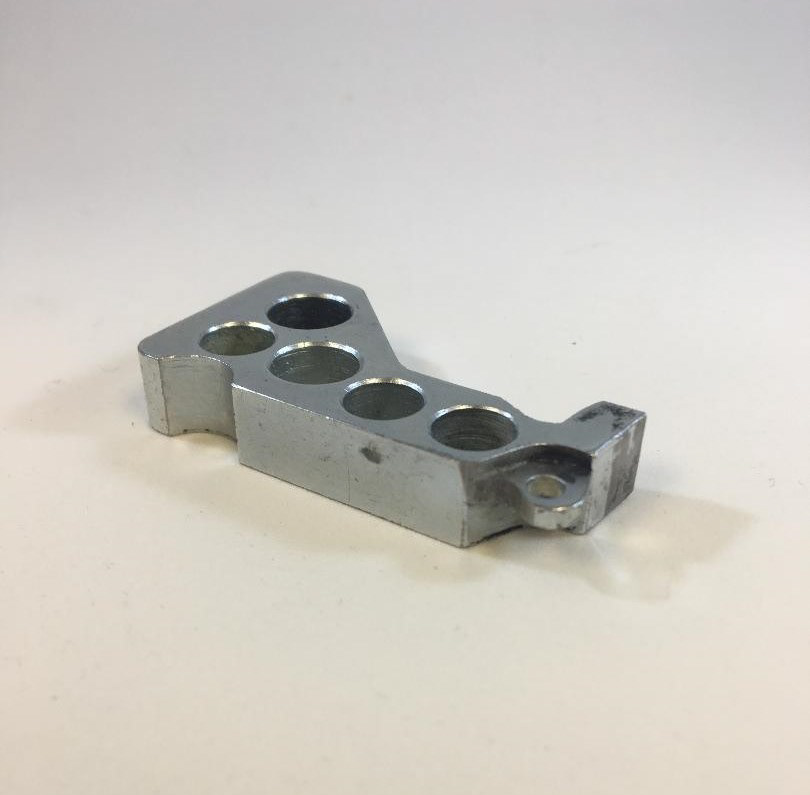
The original metal version of the gate latch part.
I photographed and held the object I was intending to replicate.
By getting my hands-on and testing the needed solution for replication,
I could then better understand its mechanics.
The original metal version of the gate latch part.
I photographed and held the object I was intending to replicate.
By getting my hands-on and testing the needed solution for replication,
I could then better understand its mechanics.
Step 2: Learn the Tool
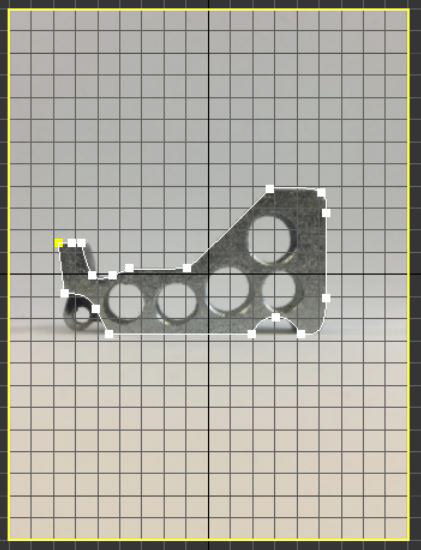
Spline Model Tracing from Photo of Side View in 3ds Max/Blender.
I knew I had to start somewhere to keep with a short timeline by getting this at least test-printed by the end of the day.
By utilizing the digital tools and tutorials/education available, I knew that the solution wouldn't be perfect on its first iteration.

Extrusion of the Traced-Spline to 3D Model, set to Accurate Measurements.
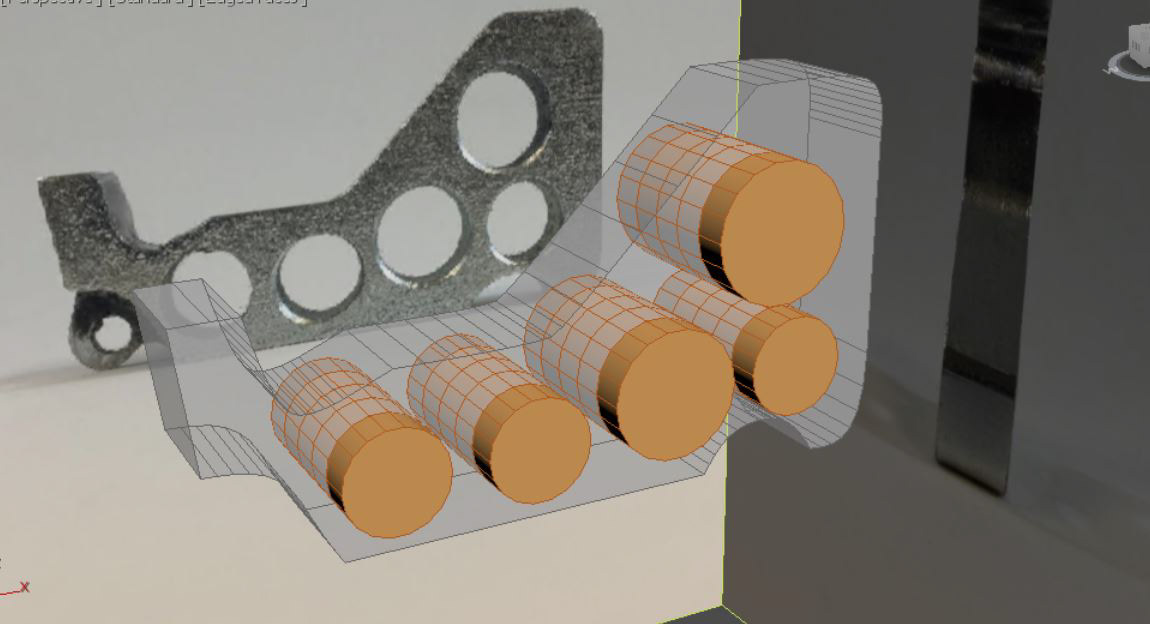
ProBoolean Cut Holes, set to Accurate Measurements.
Step 3: Test, Repeat, Perfect
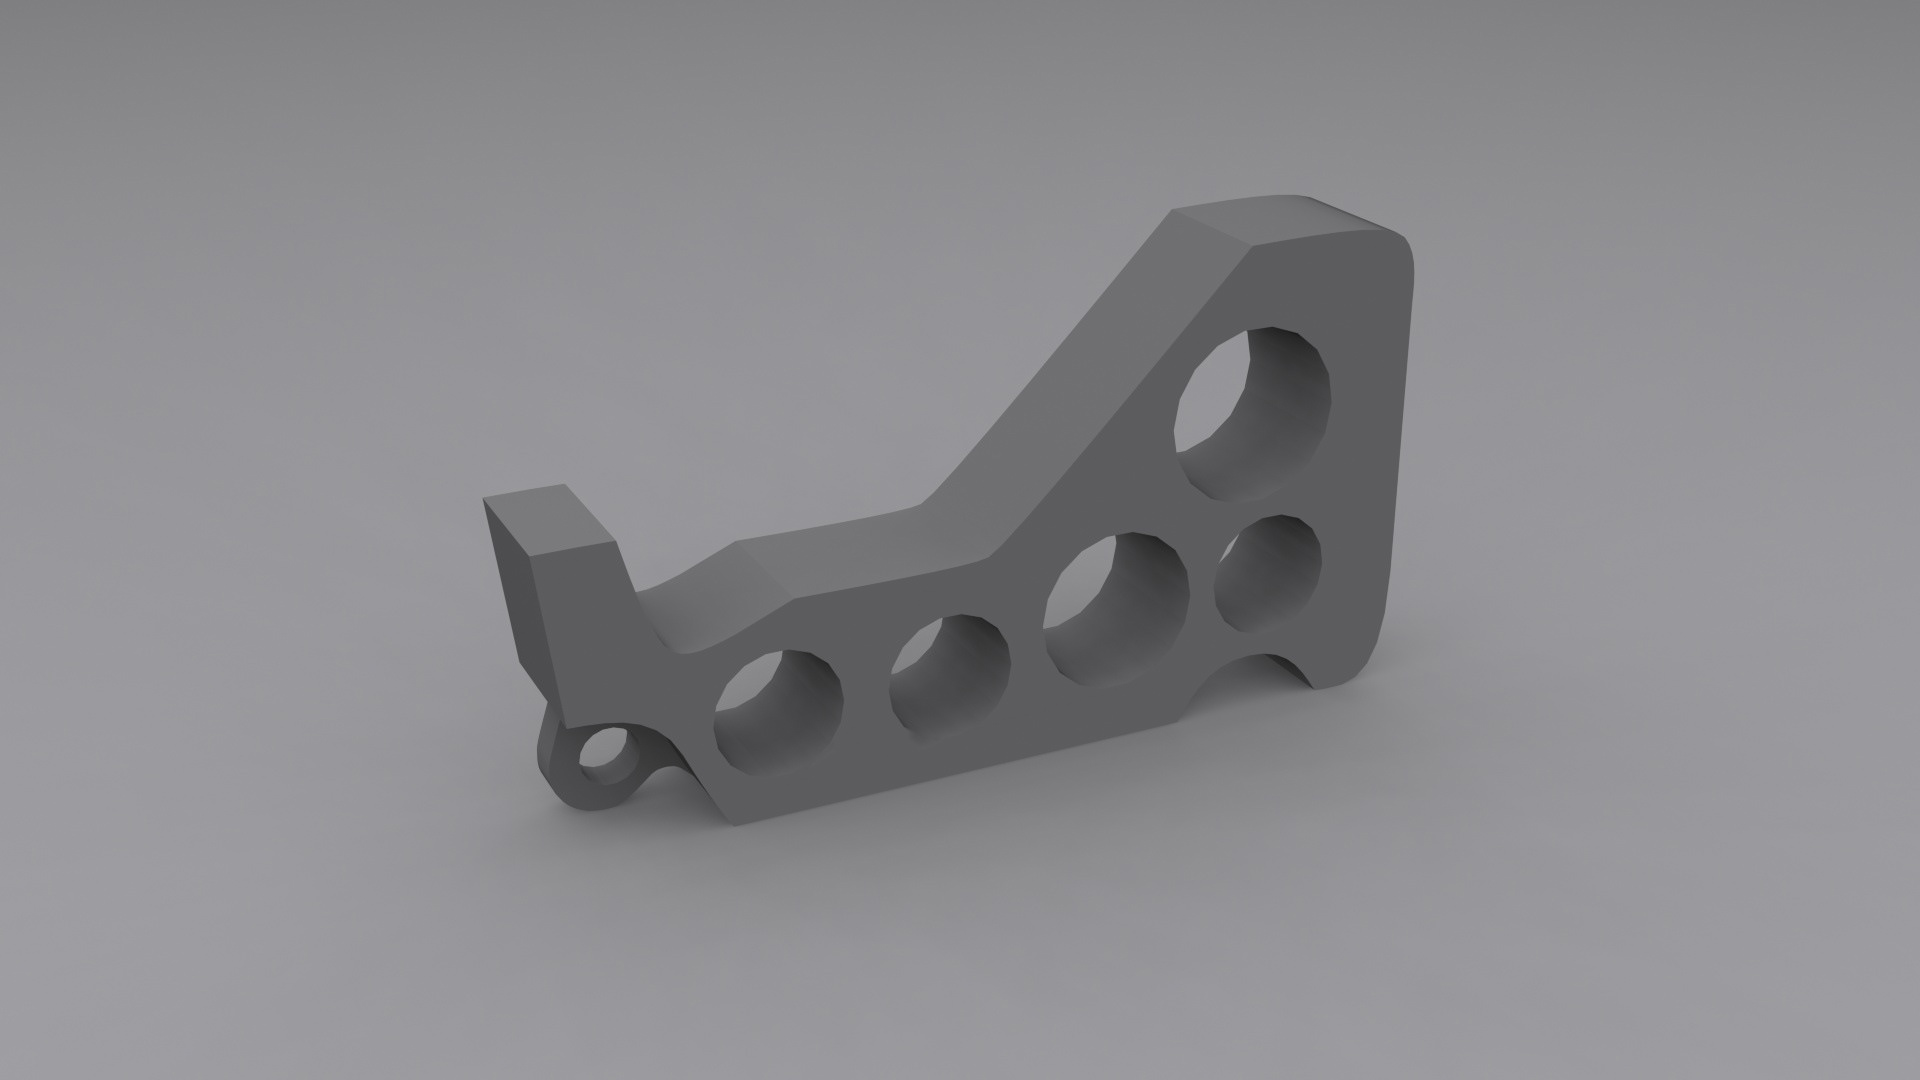
After the first test print, I just needed to account for some 'give' on the holes, so I increased the diameter ever so slightly. Leading to the now the finalized 3D model ready for Accurate 3D Print Replication.
Having tested the solution, I not only discovered a quirk to the medium but continue understand the importance of testing a solution until it meets the required quality for delivery.